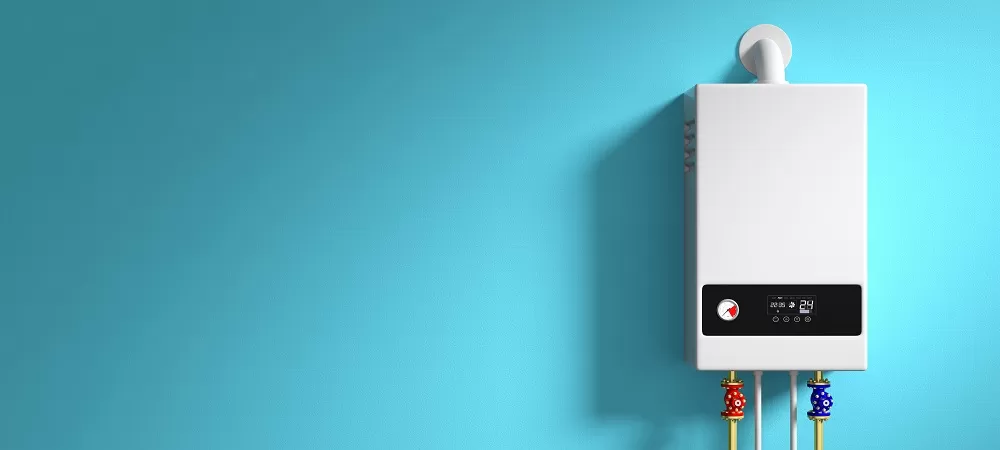
Water heaters, whether electric or gas, are absolute lifesavers, particularly during winter. Owing to the frequent use of water heaters, they tend to develop faults as time goes on.
While some repairs may require the expertise of a technician, others don’t. Hence, the DIY water heater repair method becomes important in case of emergencies.
Gas water heaters are more susceptible to gas leaks and the pilot light going out. While their counterparts, electric water heaters, often develop thermostat problems. Knowing how to troubleshoot faulty water heaters can come in handy if there are no technicians available. Also, using DIY methods for water heater repair can help you cut down costs.
Diagnosing and repairing your faulty water heater no longer has to be a tedious task. Here is a guide on how to fix a faulty water heater without the help of a technician. In this article, we’ll hand out water heater repair tips as well as ways to maintain your water heater.
Common Water Heater Problems
Here are some common water heater problems.
Water heater not working in some areas of the house
Not having hot water in some areas of the house means your water heater is working well. However, the parts not having hot water may be a result of a faulty connection.
In some instances, the bathroom may have hot water running whereas the kitchen water is as cold as ice. In this case, there may be a restriction of water flow or a frozen pipe. Here are some probable reasons hot water isn’t working in some parts of your house.
The pipe has mineral deposits
If your steel pipes are old and rusty or you’ve never had them changed, you should. Old water pipes made of steel can restrict water flow when there are mineral deposits in them.
In some cases, large pieces of mineral deposits from inside your heater may have travelled inside the pipes. Pieces of mineral deposits can clog the elbow of the pipe, thereby restricting water flow.
Distance
Water heaters far from some areas of the house can cause those parts not to get hot water. The hot water pipes go through an unheated space like the basement, giving off most of their heat in the process. To rectify this problem, you can increase your water heater heat dial. Alternatively, you can install a new water heater around the affected parts of the house.
Faulty plumbing connection
A faulty plumbing connection has nothing to do with blockage as long as the water pressure is fine. During pipe installation by a plumber, there may be a mixed connection.
In a mixed connection, the cold water valve is leading to the side meant for hot water. The result of a mixed connection is the hot water not reaching some parts of the house.
Frozen pipes
Frozen pipes are common during winter and can cause restricted water flow to some parts of your house. You can get rid of frozen pipes by thawing them yourself or calling a professional.
DIY water heater repair for a frozen pipe involves you applying heat to the frozen section. You can apply a hot towel to the pipe’s frozen section or use a heating pad.
Heater not producing enough water

Another common problem most homeowners face with their water heater is the water being lukewarm. When you notice the water isn’t hot enough, check the temperature switch. If you’re using a gas water heater, check the gas control dial. The temperature switch on your water heater should be set to hot.
If your water temperature hasn’t increased after a while, you may have a broken dip tube. The job of the dip tube is to supply cold water to the water heater’s tank.
Old water heaters are likely to have a cracked or broken dip tube. A broken dip tube causes cold water to be mixed with hot water, resulting in lukewarm water.
You have the option of replacing the dip tube if the water heater is fairly new and still has a warranty. However, if the water is old with an expired warranty, you can consider getting a new water heater. An old water heater will eventually cost more if you have to replace parts constantly.
Gas leaks on a gas water heater
The most obvious sign of a gas leak is the smell of gas. While gas leaks are uncommon, you should handle them with urgency. Gas leaks are hazardous as they can cause a fire. Here are some signs of gas leaks:
- A hissing sound
- Rotten eggs or gas smell
- Physical symptoms like difficulty in breathing, headaches, throat and eye irritation, nausea
- Damaged gas pipe
Related Article: How Do I Keep My Furnace in Good Condition?
DIY Water Heater Repairs: How to Troubleshoot Your Appliance
A faulty thermostat can result in your electric water heater malfunctioning or not working at all. On the flip side, your gas water heater may be out of gas. However, if the gas tank isn’t the problem, you may have a defective thermocouple.
While calling a technician is a good idea, you can try the DIY method. Here is a DIY guide for water heater repairs.
Faulty water heater thermostat
A water heater thermostat operates off a double-metal switch situated behind the thermostat. The double-metal switch either pops in or out to disconnect or connect the power supply according to the temperature. The clicking sound from your water heater is a result of the temperature increasing or decreasing.
A thermostat consists of a primary and secondary thermostat. Primary thermostats are located above the secondary thermostat and mounted on a limit switch. If your thermostat is faulty, you will need an expert water heater technician to replace it.
Some things to have in mind when buying a water heater thermostat are,
- Your water heater voltage {typically around 240 volts}
- The total number of elements present in your water heater
Furthermore, it helps change your limit switch when replacing the thermostat. Usually, stores sell both the upper thermostat and limit switch together. When replacing a thermostat, replace both the primary and secondary thermostats.
You can check if your thermostat is faulty with the power off or on. However, to be safe, it’s advisable to fix electrical appliances with the power off. To replace your thermostat,
- Turn off the water heater
- Remove the insulation and plastic safety covering
- Loosen the thermostat using a screwdriver. Pull out the loosened thermostat and its bracket
- Push in the new thermostat bracket. Ensure the lock clips are holding it firmly in place
- Slide in the water heater thermostat replacement into the new bracket
- Rewire the new thermostat.
- Repeat these steps for the lower {secondary} thermostat.
Faulty water heater relief valve
Another reason your water heater isn’t working may be a faulty relief valve. Experts also refer to the water heater relief valves as temperature and pressure relief valves.
They serve as safety devices to relieve your water heater of high pressure or temperature. Without a relief valve, the water heater can explode owing to the expansion of water when hot.
Your relief valve may be releasing huge amounts of water due to increased temperature. Check your thermostat or replace a faulty thermostat.
It’s important to check your water heater relief valve at least bi-annually to catch malfunctions early. To replace a faulty water heater temperature and pressure relief valve,
- Turn off your water heater {this applies to both gas and electric water heaters}
- Cut off the water supply to the water heater
- Ensure the water level in the water heater is below the relief valve
- Unscrew the valve with the help of a wrench
- Install the new valve using pipe dope or teflon tape
- Go ahead and install the line used in draining the valve
After following these steps, refill your water heater and turn it on. Check the valve line for leaks.
If none, turn on your faucet to ensure all air trapped inside the valve line escapes. Request the services of a water heater repair technician if you’re unable to replace the relief valve.
Thermocouple replacement
The thermocouple is the device that measures the temperature level in the heater. A gas water heater makes use of a pilot in igniting the burner and also possesses a thermocouple.
Should the pilot light die, the thermocouple serves as a safety device. Additionally, it prevents leaks from the gas valve. Problems with the water heater thermocouple include dirt on the thermocouple and continuous blockage of the gas valve.
You can clean a dirty thermocouple with the use of emery sandpaper. Remove the access cover and clean it directly without removing the burner components.
The burner components consist of the thermostat, main supply tube, pilot supply tube. However, if you can separate these pieces, it makes cleaning easier to do.
Using the emery cloth sandpaper, sand the ends of the thermostat. Give it a finishing touch with the lint-free cloth. To replace the faulty thermocouple, slide it out and replace it with a new one.
We recommend you get a professional to separate the burner components. If you intend to attempt removing it, refer to the user manual. Note that the installation procedures can differ depending on your water heater brand.
Water heater limit switch

A water heater limit or the reset button is a safety device designed to turn your appliance off when it gets too hot. A faulty thermostat causes the limit switch to trip when the water gets hot.
Modern electric water heaters have two heating elements and two thermostats. However, they mostly have one reset button. If you cannot easily find your water heater limit switch, consult your user manual.
Search for a labelled diagram of the water heater around the front of the manual. If your electric water heater limit switch has tripped, you will need to reset the thermostat. The reset switch will be right next to one of the thermostats (usually the upper one).
Simply push the button (without touching any nearby wires) to reset the thermostat. Pushing the button will restore power to the thermostats, heating your water within an hour.
Relighting the pilot light
A pilot light is a little fire that burns in a gas water heater. When you switch on your heater, gas is released to the central burner, lighting the pilot light. Without it, the water heater won’t heat up.
Sometimes, the pilot light may refuse to light. Some of the reasons a pilot light refuses to light are,
Dirty pilot tube
Dirt can collect in the pilot tube, blocking the flow of gas. As a result, the pilot doesn’t get enough fuel to stay on. To fix a dirty pilot tube, use a needle to slide into the pilot hole and remove any debris.
The process may take a while, depending on how much debris is in the tube. Check to see if it works by lighting the pilot light. If it lights up properly and stays lit, a healthy flame will be blue.
Blocked thermocouple
The thermocouple picks up an electrical signal from the pilot light’s heat to determine whether or not the pilot is on. When dirt particles get in the way, it can disrupt this signal.
The disruption causes the thermocouple to believe the pilot light is off. It then shuts off the gas supply as a safety precaution.
Damaged thermocouple
This is a more severe scenario, as it may require replacing the part. Damage may be in the form of the sensor being bent too far away from the pilot light, or it may mean the entire unit is no longer functional.
Examine the thermocouple. The sensor at the end should lightly touch the flame when the pilot light is on. In the event it has become bent away from the flame, gently bend it back.
Test a thermocouple that shows no signs of damage with a multimeter. The reading should be above 20 MV. Any reading below this is a clear sign that the thermocouple is damaged and needs replacement.
Main control valve
This is the problem you want to avoid out of those which you can diagnose yourself. The easiest way to diagnose a bad control valve is to try all other solutions first.
There is only one way to fix a bad control valve, and that is to replace it. Compared to other DIY water heater repair tricks, a faulty control valve is quite expensive. Also, it’s more difficult for those inexperienced with this sort of work.
Water Heater Maintenance Tips
Typically, you can use your water heater for about 5 to 12 years. Prevent water heater repair DIY’s by adequately maintaining your water heater.
Below are effective water heater maintenance tips:
Check water pressure
Check the water pressure at the drain valve or hose bib. Water pressures are higher at night and lower during the day. If the water pressure is above code maximum (80 psi), install a Pressure Reducing Valve (PRV).
Control water pressure
Most experts recommend setting the Pressure Reducing Valve to 50-60 psi to protect appliances. High water pressure can damage the water heater. Ensure you maintain the right pressure level.
Control thermal expansion

Plumbing codes have always required an expansion tank on closed plumbing systems. Operating a water heater on a closed plumbing system without an expansion tank will damage the water heater.
Ensure you pressurize the expansion tank with air before installing it on a cold water line. Air pressure should always match water pressure.
Inspect T&P relief valve
Ensure you control water pressure. T&P relief valves will drip if the water pressure is too high.
Drain and flush tank
Turn off the cold water supply, and open the drain valve. Open T&P relief valve to relieve pressure. Drain 2-3 gallons of water. If water appears milky, drain the entire tank. Close the drain valve and open the cold water supply valve.
Check/replace anode rod
The anode rod helps reduce corrosion and extends the water heater’s lifespan. Turn off the power (or gas).
Turn the cold water supply off and relieve pressure in the tank. Remove the anode rod with a 1 1/16” socket and impact wrench. Replace if worn out.
Check the anode rod at least every three years, depending on local water conditions. Also, check your water heater annually if you use a water softener.
Related Article: Furnace Repair Guide – Costs, FAQs and Tips
To Sum It Up
Over time, water heaters develop problems owing to how frequently you use them. To ensure you get the best from your water heater, give it a routine check at least twice a year.
Tired of cold baths because your water heater isn’t getting hot? Our DIY water heater repair guide above will help you fix a faulty water heater.
If your water heater still doesn’t work after using these tips, ALP Heating can help. Our appliance repair technicians have the experience to troubleshoot your device and fix it the same day!